Tutorial
Step 1
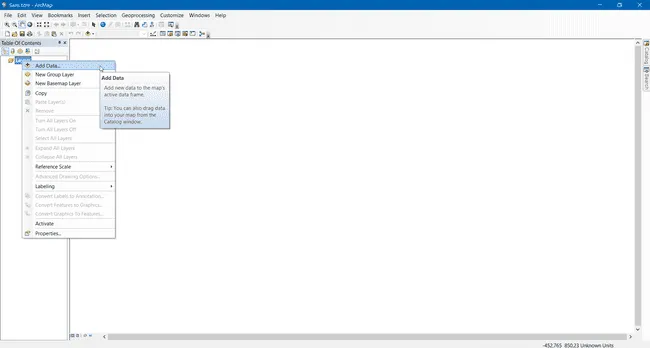
To import WMTS file layers in ArcMap, right-click on the Layer item on the left panel menu, then Add Data...
Step 2
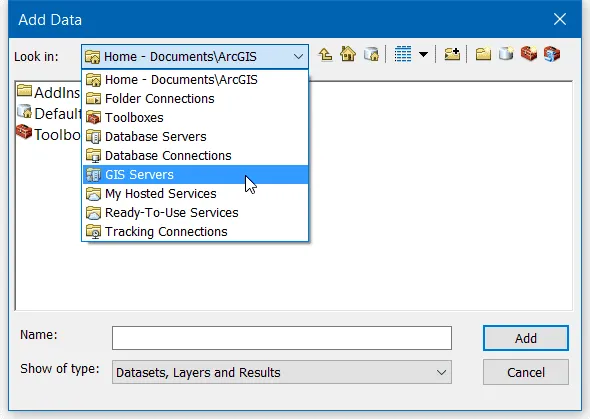
In the new opened window, click on the dropdown list and select the GIS Servers item.
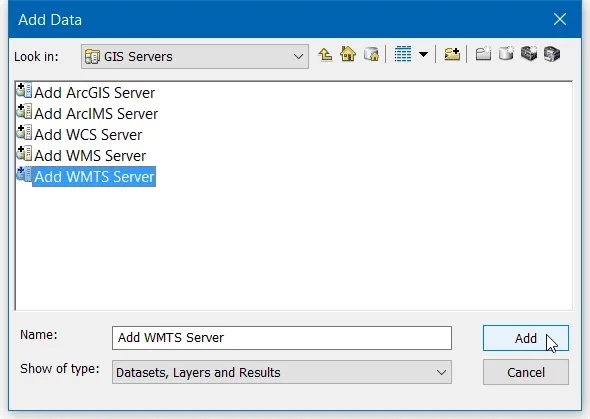
The window is refreshed, and you can double-click on Add WMTS Server... or select the item and click Add to create a new data source for ArcMap.
Step 3
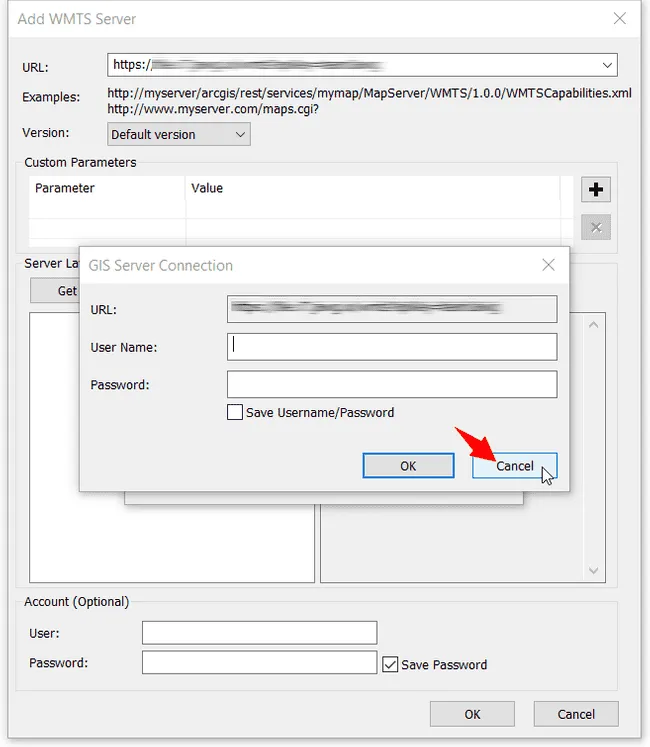
A new window opens with settings to configure. Paste the link of your WMTS access in the first input, then click on Get Layers to retrieve the WMTS data.
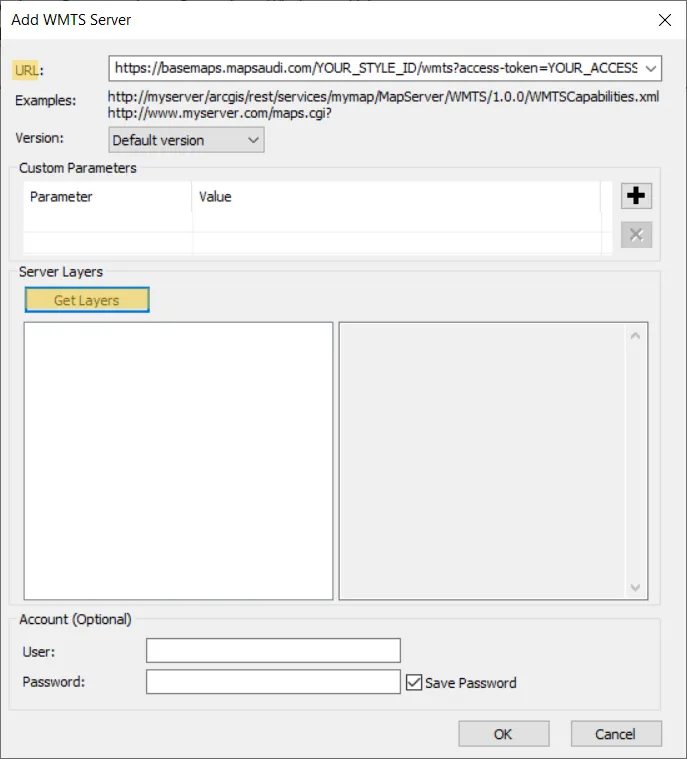
A window will appear to ask you for a login and a password, just click Cancel to connect without login. Click OK to accept the changes and close the settings window.
Step 4
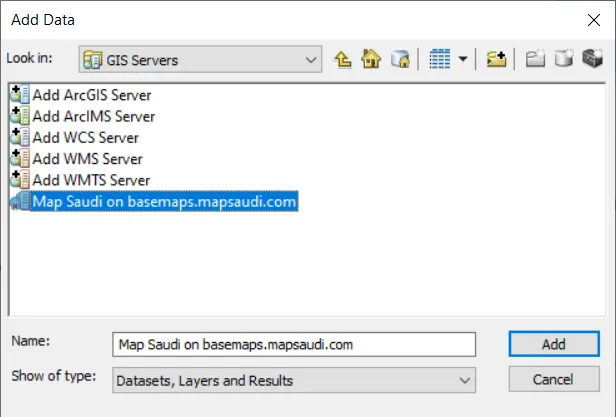
Once your WMTS server is added, double-click on the server name you've just created.
Do not click on "Add" it won't connect to your server!
Step 5
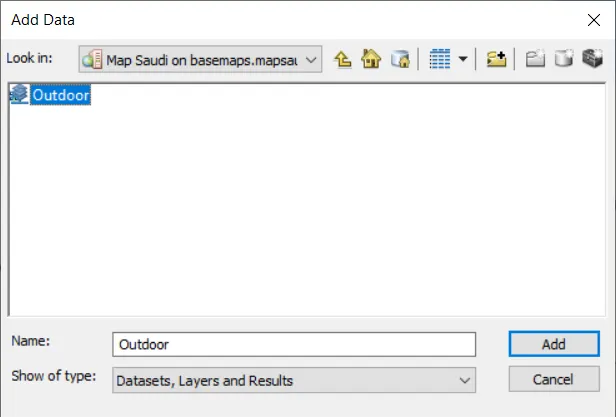
In the next view, you will be able to see the layers of your WMTS freshly imported from the web. Double-click on the layer you want to use in ArcMap.
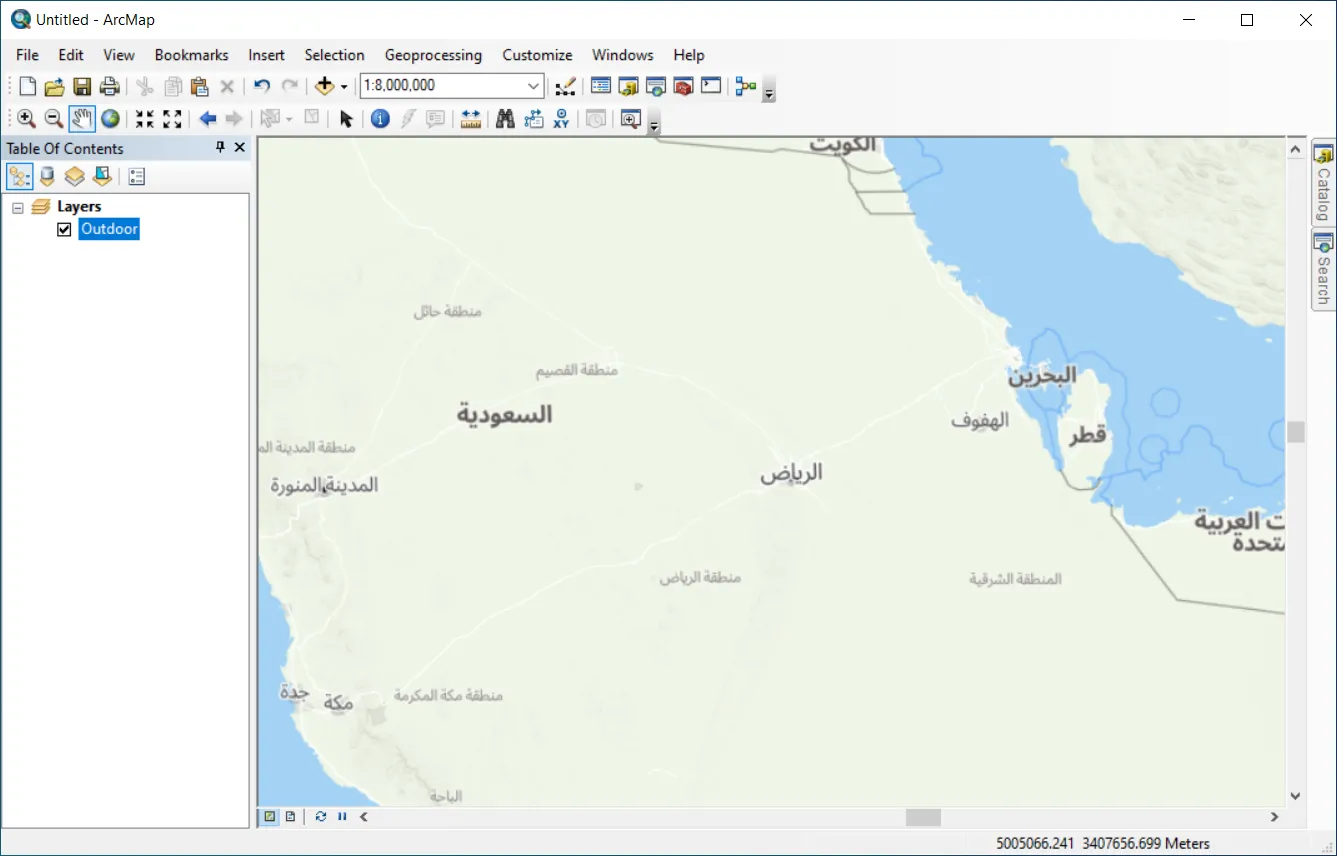
And take a look at the result!
We hope that this tutorial was very helpful!